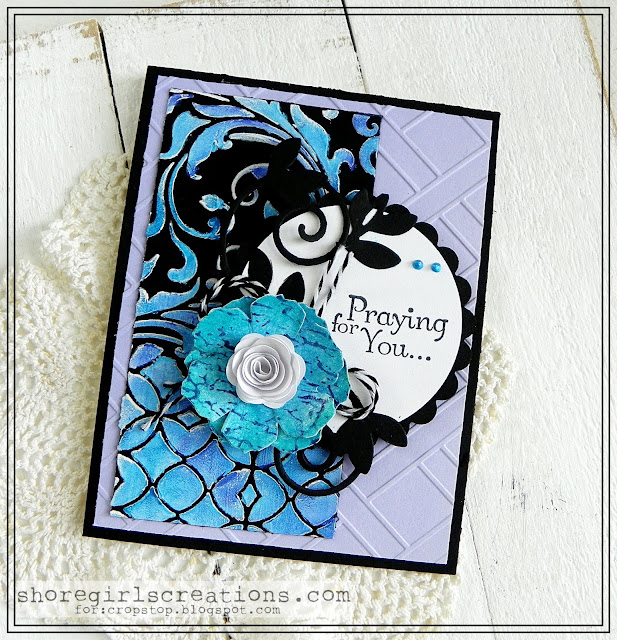
Today I'm sharing a fun new technique I learned for coloring over top of white gesso! It's super easy, a little messy, and lots of fun!
Here are the steps I used to create the pretty panel on my card:
- Lay a stencil over a piece of black card stock (I used the Watercolor stencil from Tim Holtz)
- Apply White Gesso (Art Basics) over your entire panel
- Remove stencil and wash the gesso off
- Allow your gesso to dry (or help it along with a heat gun)
- Once the gesso is dry, apply your choice of colors using Distress Crayons (Ranger) ~~ [I used Tumbled Glass - Mermaid Lagoon - Shaded Lilac]
- Rub the colors in with your finger - apply more in areas you see need it
- Remove your stencil and - wa-la - a colorful-textured background!
To create my card I:
- embossed a piece of lavender card stock with the Lattice embossing folder from Creative Expressions
- attached my gesso panel to the left side with my ATG gun
- Die cut a Circle (Spellbinders Nestabilities) in white and a scallop circle (Spellbinders Nestabilities) in black
- stamped a sentiment from Praying For You (Stampin' Up) in Tuxedo Black ink (Tsukineko)
- added some die cuts using the Romantic Vines Die set from Spellbinders
- added two tiny pearls with Ocean Blue Liquid Pearls
- Added a baker's twine bow
- Die cut two flowers using the Tim Holtz Tattered Florals Die
- inked up my flowers with Mermaid Lagoon Distress Ink (Ranger)
- stamped the crackle background (Stampin' Up) over them in Blueprint Sketch Distress Ink
- die cut a rose using the 3D flowers Sizzix die and added it to the center of my tattered floral
- popped the circular element up with mounting tape
I would love to see your take on this fun technique, so after you've finished creating - stop by the CURRENT CHALLENGE and link up!! Hope to see you there!


3 comments:
Looks wonderful !
so pretty, I just love the colors against the black background!!
Beautiful mixed media card, Esther.
Love the technique how to color the gesso
Post a Comment