Showing posts with label spectrum noir. Show all posts

Friday, December 28, 2018

Guest Designer - Jennifer Lewis


Welcome back to our last Guest Design post for the month of December! It's been a pleasure sharing the work of Jennifer Lewis this month! (You can visit her Splitcoast Stampers Gallery by clicking here.) She has one last beautiful card to share with us today....

"For this card, I used the Great Almanzo Embossing Folder by Couture Creations that I received in my prize package from the October Link Party.  I decided to use it with one of my favorite embossing folder techniques—Crayon Resist.  I placed my white cardstock on the open embossing folder and rubbed a white crayon all over it.  I really love the soft image that appeared as I sponged Cracked Pistachio and then Peacock Feathers over it.  Using the Peacock Feathers ink, I stamped these Ranger flower stamps and colored them with my Spectrum Noir markers as a cheerful background for one of my favorite sentiments from the Ranger Letter It Birthday stamp set.   I started to assemble the layers all nice and straight, but then thought it would be more fun and playful with the panels tilted.  And I added some random black Enamel Accents as a finishing touch."

Supplies and Tools:
Stamps:
Inks:
Other Products:


Now it's your turn to share the projects you've been working on! Stop by the current link party and link up any creation that includes a product or two from one of the companies carried in the Cropstop store. Hope to see you there!

Friday, December 21, 2018

Guest Designer - Jennifer Lewis


Hello Friends! It's hard to believe that Christmas is just a few days away! I love this beautiful card  created by our talented guest designer for the month of December -- Jennifer Lewis! (You can visit her Splitcoast Stampers Gallery by clicking here.) I have this same stamp set, and her gorgeous design makes me want to pull it out and ink it up!

Here's what Jennifer says about putting this card together:
"I started with an alcohol ink background of green and red to give the feeling of an evergreen bush with red berries.  I stamped the birds, cutting one out with my ScanNCut and drawing a few extra branches around the other bird.  I colored them both with my Spectrum Noir markers and sponged a bit of Pear Tart around the top bird.  I finished the card by matting the panels with black cardstock and stamping a sentiment banner to ground the bottom bird, who is popped up on foam squares."  

Supplies and Tools:
Stamps:
 Paper:
  • Papertrey Ink Paper Basics white
  • Ranger Yupo paper
  • Neenah Exact Index
  • Astrobrights black
 Inks:
  • Memento Tuxedo Black and Pear Tart
  • Ranger Alcohol Inks in Citrus, Lettuce, and Cranberry
  • Spectrum Noir Markers 
Other Products: 
  • WeR Precision Press
  • My Favorite Things Die-namics stitched square die 
  • foam squares
  • Papermate Inkjoy gel pen
  • Brother ScanNCut


 Now it's your turn to share the projects you've been working on! Stop by the current link party and link up any creation that includes a product or two from one of the companies carried in the Cropstop store. Hope to see you there!

Friday, December 7, 2018

Guest Designer - Jennifer Lewis


 Today we have a brand new guest designer here on the Cropstop blog. Her name is Jennifer Lewis and she makes some super cute cards! (You can visit her Splitcoast Stampers Gallery by clicking here.) Jennifer is sharing a fun masculine card with us today. In her own words Jennifer says:

"This card started with a magazine print transfer on my Gelli Arts Gel Printing Plate.  I've found that the Ranger Distress Paints work really well to get just the right thin layer of paint to pull a good print.  But the travel magazine that I used had pages that were a bit too glossy to get a great print. No problem, It still makes a cool background.  And because I had been using a travel magazine, I was inspired to make a card using my Art Impressions "Born to Ride" stamp.  In order to make it look like a Polaroid picture snapped on a road trip through this place in the magazine picture, I masked off a square to stamp the biker and sponged in some blue sky all around him. I popped my "Polaroid" up on foam squares at a carefree angle and tied it up with a bit of black twine."


Stamps:
Art Impressions "Born to Ride"

Inks:
Memento Tuxedo Black and Bahama Blue
Distress Ink -  Black Soot
Spectrum Noir Markers

Other Products:
Distress Paints in Black Soot, Wild Honey, Spiced Marmalade and Picked Raspberry
Spellbinders Card Creator A and B dies
 Now it's your turn to share the projects you've been working on! Stop by the current link party and link up any creation that includes a product or two from one of the companies carried in the Cropstop store. Hope to see you there!

Friday, October 12, 2018

Guest Designer - Lisa

 We're back for week number two with our talented Guest Designer - Lisa of This Sweet Madness! This week Lisa has a super fun shaker card for our inspiration. Here's how she put this adorable card together:

"Hi everyone!  Lisa here from This Sweet Madness with another guest designer post.  I've been challenging myself to make more masculine cards lately, so I wanted to create a birthday card with a White Rabbit theme.

1) I started by making my card base from Desert Storm cardstock.  I created an A7 base so the pocketwatch die would fit.

2) I picked a pattern from the Tattered Time stack that I liked and cut it slightly smaller than my card base.  After die cutting the pocketwatch, I set it aside and attached a scrap of the same patterned paper to my card base.  I layered the positive part of the pocketwatch die cut to the base with Scor Tape.  

3) I stamped the White Rabbit with Archival Ink on the smooth white cardstock.  After it dried, I colored it with Prismacolor pencils.  I fussy cut it and then adhered it to the card base with Scor Tape.

4) I attached the acetate to the patterned paper with the watch cut out with Scor Tape.  The acetate won't stick without really strong adhesive.  Then I created a shaker opening with foam circles and squares, piecing them together tightly to make a well to hold my sequins.  I like to lay them out on the card base so I can see how many I do or don't need to add.  When I was happy with the amount of sequins I added, I removed the backing from the foam pieces and attached the shaker frame to my card.

5) I had stamped the "Tick Tock" on a scrap piece of the smooth white cardstock.  After cutting them out with the Gift Tags dies, I colored the entire thing with colored pencils, then went over the edges and the words with a gold Sharpie marker.  I knotted the gold ribbon through each tag and added them to my card with Mini Zots.

Thanks for looking!  Don't forget to enter the Crop Stop Linky Party this month.  Laters!"


Products Used:

TimHoltz Pocket Watch die
TimHoltz Gift Tags Die set
3L Adhesive Foam Circles and Squares
Ranger Jet Black Archival Ink
Visible Image White Rabbit stamp
Prismacolor 150 Pencil Set
Gold Sharpie marker
BazzillDesert Storm cardstock
SpectrumNoir Ultra Smooth cardstock
DCWWV Tattered Time paper pad
Graphix Acetate sheets
Offray 1/2" gold shimmer ribbon
Creatology Green Sequins Assortment

Now it's your turn to share the projects you've been working on. Stop by the CURRENT LINK PARTY and showoff anything that includes a product or two from one of the companies that Cropstop carries in the store. 

Friday, September 14, 2018

Guest Designer - Darlene Pavlick


 It's guest designer Friday again, and today we have a super cute card created by the talented Darlene Pavlick of Dar's Crafty Creations! Oh my, I just love the adorable little scene she's created with Memory Box Dies!!  Darlene shares how she created this card....

"The card I have created to share with you today can be used for a variety of occasions or just as a note card.  The 'deer' little scene I've created makes me smile ... I hope it makes you smile too!

It all started with the background utilizing inks and embossing.


For the embossing,  I used a Darice 'Cloudy Sky' embossing folder and did a little outlining with a white Gelly Roll pen to help add even more dimension to my clouds.


While the Memory Box 'Deer in the Trees' #99275 die cut was still in the paper, I did my coloring using Spectrum Noir Alcohol Markers.


Isn't this new Memory Box 'Woodland Bridge Frame' (#94039) awesome?  I love the bridge concept and I turned the little deer into a 'fawn' by putting the spots on his rump!  More coloring done with the same Spectrum Noir alcohol markers and inks.


I wanted to create dimension in the scene so I've cut out 3 additional 'Deer in the Trees' die cuts and glued them all together with the colored one on top.


My sentiment is by Sue Wilson but you could use any number of stamp or die sentiments."


Crop Stop Product Used:
I'd love to see what you've been creating of late so stop by our CURRENT LINK PARTY and showoff any project that includes a product or two from one of the companies Cropstop carries in the store. Hope to see you there!
Friday, July 20, 2018

Guest Designer - Heather Mills


We're back with another project from a talented guest designer. Today we're sharing the work of Heather Mills of Wire Wrapture. Heather created a beautiful summer themed card featuring sunflowers with fun sparkly centers! I love how she paired her image with the wood grain embossing folder - perfect combo!

Here's what Heather says about putting this lovely card together:

"I started out with some white co'ordinations card stock (which of course, I cut using my Fiskars paper trimmer!) for my base and scored it with my scor-pal as a top folding card.  For my next layer, I used the Darice Woodgrain embossing folder to emboss another piece of co'ordinations card.  Then I used my Ranger mini ink blending tool to ink the edges of the embossed panel with Tim Holtz Antique Linen Distress ink.  I use Spectrum Noir markers to color my image twice, so I could cut out the two larger sunflowers and pop them up with some foam tape.  Then I used Ranger Cinnamon Stickles to dot the center of the flowers.  I love the sparkle it adds.  I matted the image panel with some My Favorite Things brown card stock and then layered that on some My Favorite Things patterned paper.  I heat embossed my sentiment with white embossing powder on a scrap of the same MFT card stock and added 3 tiny rhinestones.  For adhering things together, I use my Tombow permanent adhesive runner for most things.  I used it to adhere the image panel and the mats together.  But whenever I adhere embossed panels, I like to use scor-tape as I feel it gives a stronger hold.  In the picture below, you can see more of the sparkle from the stickles."


Now it's YOUR turn! Stop by our current link party and showoff any project that includes a product or two from one of the companies Cropstop carries in the store. 

Friday, July 13, 2018

Guest Designer - Darlene Pavlick


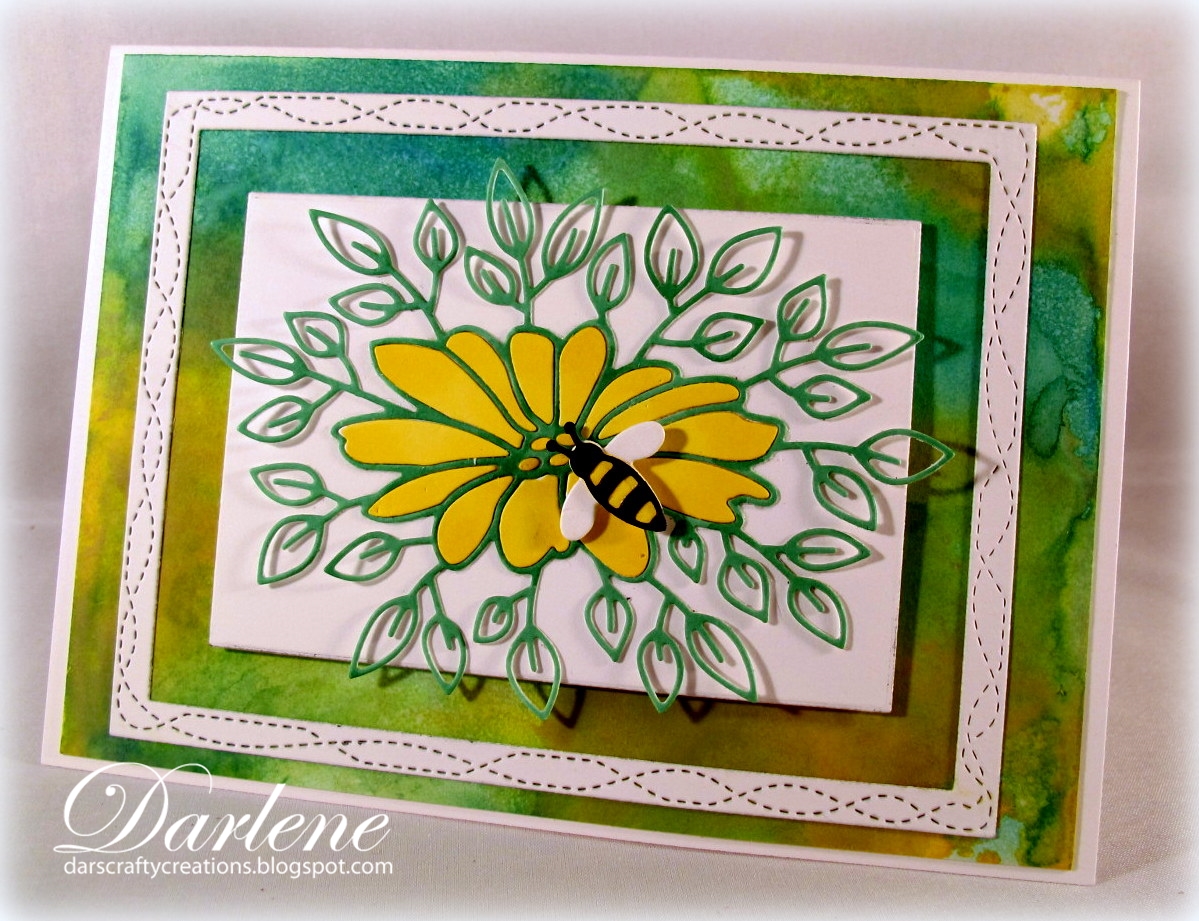
Hello blog friends - it's time for another Guest Designer Friday! Today we're sharing the work of one of my talented friends, Darlene Pavlick of Dar's Crafty Creations. Darlene is one of those sweet people who has offered to guest design here on Cropstop whenever I have an empty space to fill! More than once she's been a "lifesaver" when I needed someone, and always a creates the most beautiful cards to share with you! For this post she also included a picture tutorial for you...So without further ado here's what Darlene says:


"Happy Friday Everyone!
I'm  so excited today!  
I've once again been asked to guest design for the CropStop Blog.  YEAH!!
Here's what I've created using products they carry in their store.


It all began by creating my focus flower which is 'Daisy Delight' by Memory Box.
I've die cut it twice from white card stock then colored the popped out pieces of the one panel using Spectrum Noir alcohol Marker CT4 and then colored second panel which will be my outline piece using Spectrum Noir alcohol Marker JG1.
 After coloring, I die cut my framing panels using the 'Wrapped Stitched Frames' also by Memory Box.  I've used the largest frame for my actual frame but used the next size down 'inset' to adhere my flower to.  Once I had the outline adhered I then pieced in the yellow flower petals.
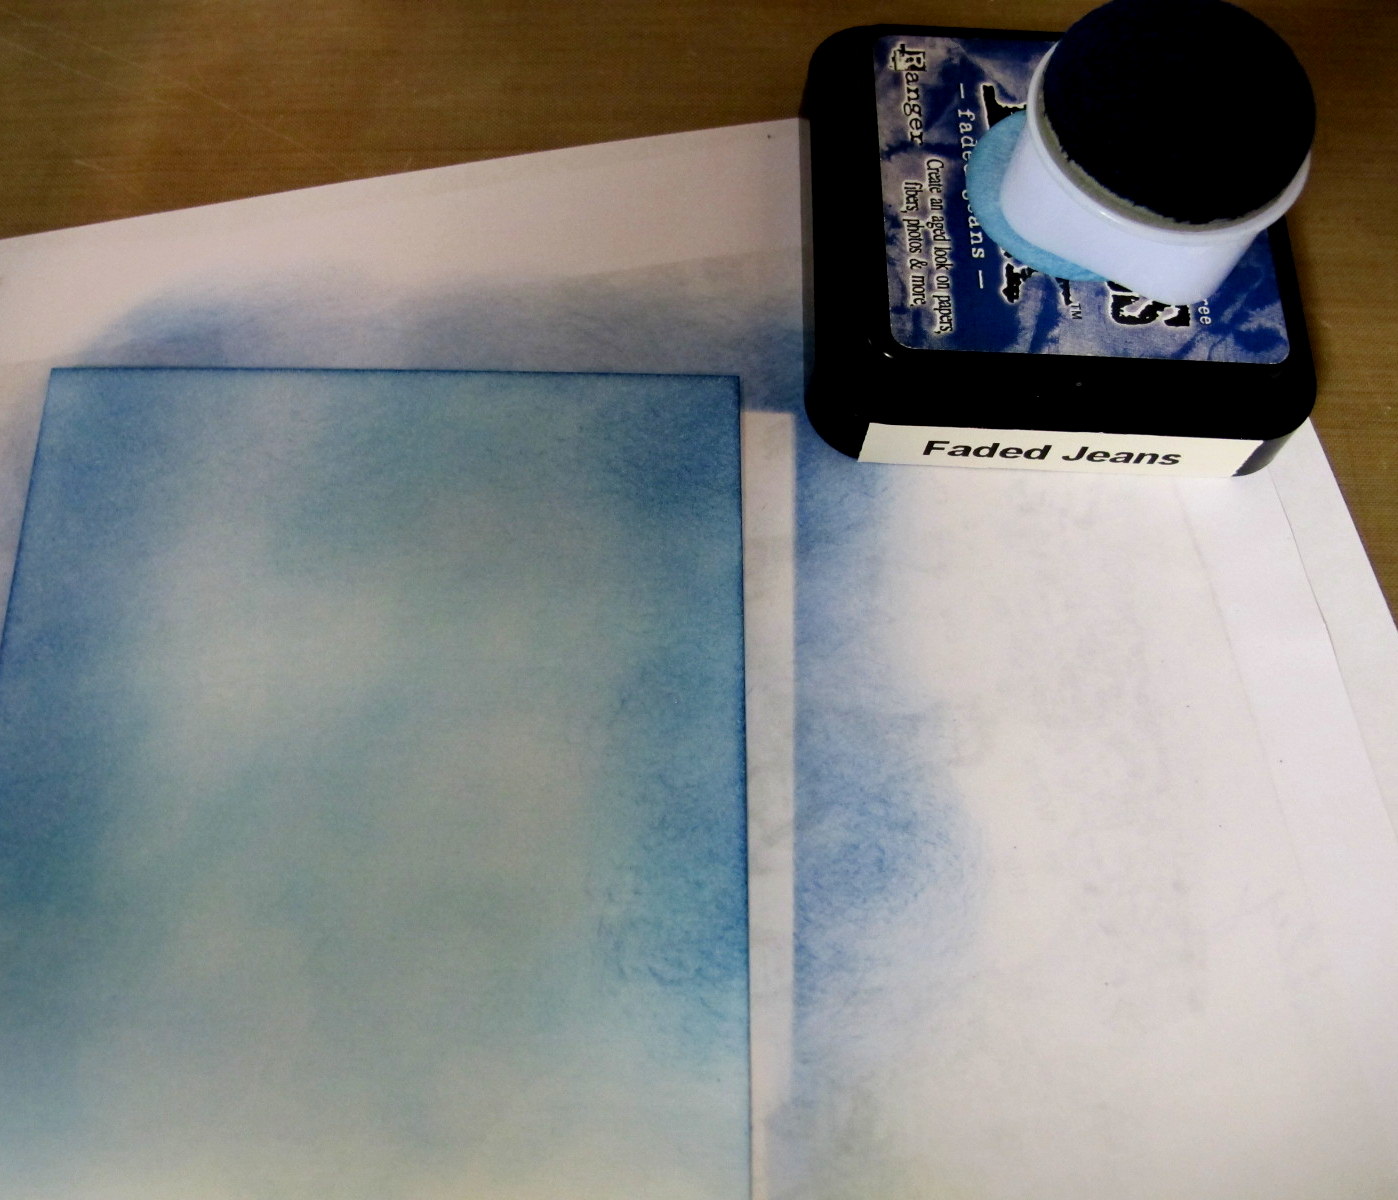
 Next came my background panel.  I wanted to use coordinating colors with my focus flower so I used Tim Holtz distress oxide inks and watercolor paper.  I actually used Lucky Clover & Amber but as you can see where the green & yellow combined, I ended up with blue!  It happens!  Duh!  LOL
I used Scotch ATG adhesive to adhere my background panel to my white card base.  
Then, started building my layers.  Next came the large frame  ...
Then my focus flower panel which was popped up using mounting tape for added dimension.
Lastly, I added this adorable little 'Bee' by Elizabeth Craft.
It too was popped up using mounting tape."

Thanks Darlene for filling in today -- You did a fabulous job!

Now it's YOUR turn!! Stop by our CURRENT LINK PARTY and showoff the projects you've been working on that include a product or two from one of the companies carried in the Cropstop store. I hope to see you there!