

Thursday, December 31, 2009
Challenge #68 - See through...
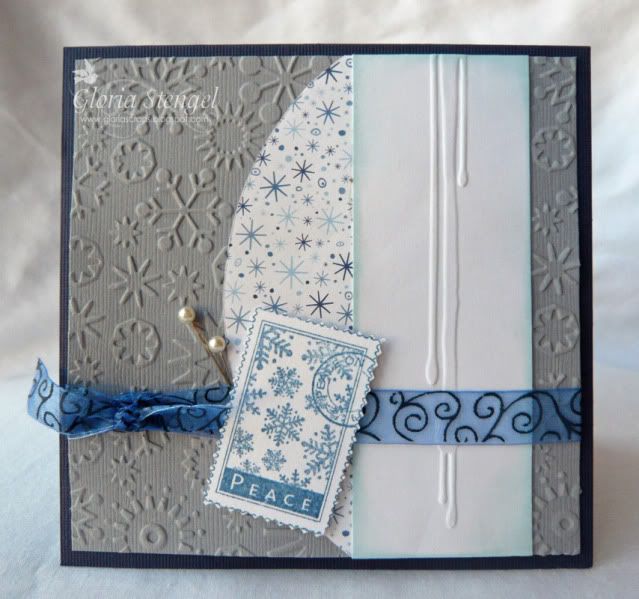
Hi ladies! This week is about see through clear are almost so. I want you to use elements that are either clear or semi clear in your projects. I have used vellum in my card as my semi clear item. I cut out my snowflakes from the Limited Edition Snowflakes cricut cartridge. Remember you have one week to submit your entry to this challenge into our weekly Challenge gallery to be eligible for our monthly random winner. Have fun! Here is my (Dalis) sample for you as inspiration.
Friday, December 25, 2009
PRE-ORDER New Limited Edition Cricut Cartridges
CropStop has the new three limited edition Cricut cartridges ready for Pre-order at the store. You have the option of buying them individually for $24.50US or all three at the incredible low price of $69.95US!
this is the Mother's Day Mini Limited Cricut Cartridge:


Wednesday, December 23, 2009
Sparkly Fluff Review
In one of my recent orders from CropStop, Haylie Jo allowed a jar of Sparkly Fluff to fall into the envelope...so I decided to try it out and tell you what I thought of it. Now, if you know me at all, you know that loose glitter is like Kryptonite to me! So I was a bit scared to open the jar!
The fluff is not like glitter. It is dense and, well, fluffy! But it does glitter some. It is sort of like glittery flocking. Here is a card I made, using the Very Cherry Red for Rudolph's Nose.
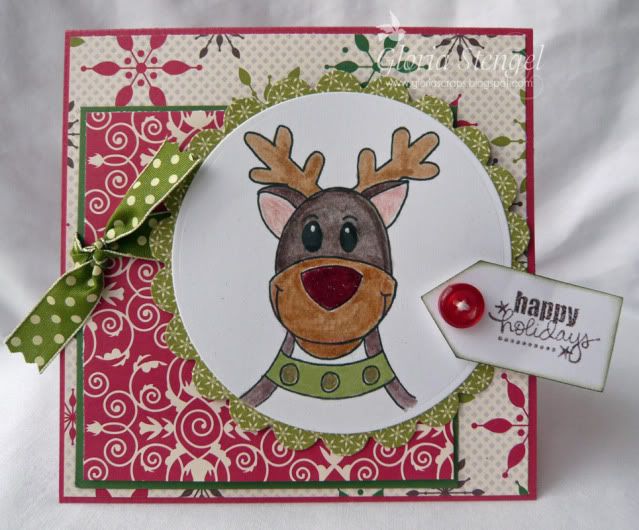
To apply the fluff, I spread a thin layer of designer adhesive from Art Glitter onto Ruddy's nose. The tip of the glue bottle is very small, so you can sort of "draw" with it. This is a thick, white glue made for applying glitter. It dries clear. (I did try some other glues, but had the best luck with the Art Glitter stuff.) Once I had the nose filled in with glue, I used a craft stick to scoop up some sparkly fluff and tap it over the glue. I just piled it on and tapped the excess off the card onto some scrap paper.
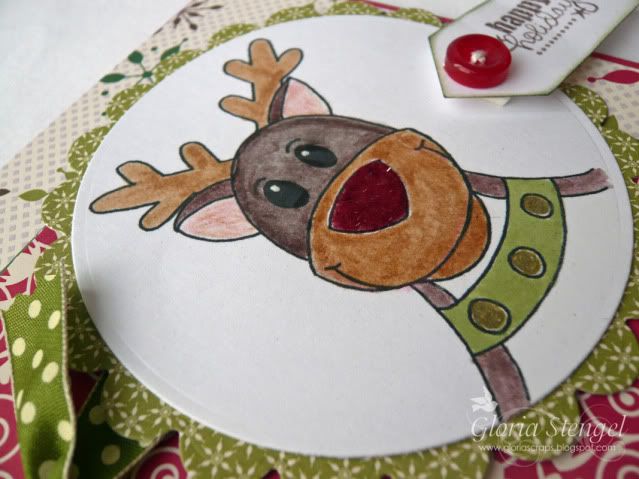
It's a little hard to see in the photo, but the nose is soft, fluffy, and sparkly! This stuff was as easy to use as embossing powder or (shudder) glitter, but less messy than glitter. The only note of caution is DO NOT try to dump the fluff out of the container the way you do embossing powder or glitter. You need to scoop it out. I is sort of packed in there and sticks together. You don't want to dump the whole jar in a big clump!
The fluff is not like glitter. It is dense and, well, fluffy! But it does glitter some. It is sort of like glittery flocking. Here is a card I made, using the Very Cherry Red for Rudolph's Nose.
To apply the fluff, I spread a thin layer of designer adhesive from Art Glitter onto Ruddy's nose. The tip of the glue bottle is very small, so you can sort of "draw" with it. This is a thick, white glue made for applying glitter. It dries clear. (I did try some other glues, but had the best luck with the Art Glitter stuff.) Once I had the nose filled in with glue, I used a craft stick to scoop up some sparkly fluff and tap it over the glue. I just piled it on and tapped the excess off the card onto some scrap paper.
It's a little hard to see in the photo, but the nose is soft, fluffy, and sparkly! This stuff was as easy to use as embossing powder or (shudder) glitter, but less messy than glitter. The only note of caution is DO NOT try to dump the fluff out of the container the way you do embossing powder or glitter. You need to scoop it out. I is sort of packed in there and sticks together. You don't want to dump the whole jar in a big clump!
Tuesday, December 22, 2009

Saturday, December 19, 2009
Embossing Folder's Review
Embossing Folder Review
By Gloria Stengel
With the introduction of personal die cutting systems and embossing folders, dry embossing has been making a big comeback in the stamping and scrapbooking arenas. Most of the die cutting system companies now make embossing folders or texture plates, which are very easy to use and come in a variety of styles. Some are folders that contain a brass template and a counter die; some styles are plastic folders with a positive and negative image (commonly called A2 folders), and some are plastic texture plates. However, they are all very simple to use. Each of these embossing mediums creates an embossed image, but the A2 size embossing folders are my favorite, as they give a fantastic embossed impression on any style of paper or cardstock.
I had the opportunity to play with Cuttlebug, Sizzix, and Quickutz embossing folders, and Sizzix texture plates. I found that the Cuttlebug Embossing Folders and new Sizzix Textured Impressions Folders are very similar and give a very deep impression. The new Quickutz Embossing Folders give what I call a light impression, similar to that of the Sizzix Texturz Texture Plates. However, I was able, by adding a sheet of cardstock (a shim) under my system cutting plate, to “encourage” the Quickutz Embossing Folders into giving a deeper impression. I also add a shim when embossing with the Sizzix Texturz Texture Plates to give a deeper impression, but I’ve never been able to get an impression close to the quality of the A2 size folders.
Cuttlebug makes a selection of border folders (in sets of 5), and small embossing folders sets of four small (2x2.75) folders, in addition to the A2 embossing folders. Cuttlebug also makes sets of “cut and emboss” dies and folders. With these sets, you can cut a shape AND emboss it in two easy steps. Sizzix Textured Impressions Folders come in sets of two A2 size folders or in sets containing one A2 folder and three or four smaller folders in one theme. Quickutz embossing folders come either in sets of four 2x2 folders, border folders, or single A2 size folders. All prices are comparable.
Here are a few ways to enhance your embossed images:
1. Use white core cardstock or paper to get a unique, distressed look to your embossed images. Once the image is embossed, rub the raised image lightly with sandpaper to remove the color from the paper. If the paper has a white or alternative color core, this will be revealed after sanding.
2. You can enhance your embossed images with chalk or stamping ink. For detailed images dip a cotton swab or foam sponge into the ink or paint, and then swipe over the image. I get the best results with Colorbox Chalk Ink or Quick Quotes Powder Puff ink.
3. An easy way to add ink to your embossed images is to open your embossing folder so that the negative side is facing down on your table. Apply ink to the negative side using either a sponge, brayer, or the ink pad itself. Place your cardstock over the inked side, close the folder and roll it through your die cutting machine as before. (Make sure to wash your folder right away, to avoid any staining from the ink.) Remember, if you are using chalk inks or pigment inks, you will want to wait for your paper to dry before completing your project.
Please stop by the CropStop Embossed Impressions folder for more information and project ideas using embossing folders, texture plates, and brass stencils.
Thursday, December 17, 2009
Almost nesties w/ your cricut
ok, so I love my Cricut and I love my Nesties for different reasons, but I love them both so, while I haven't bought the scalloped nesties yet (they are in my BUY LIST) I have been able to cut out some scallop ovals w/ my cricut.
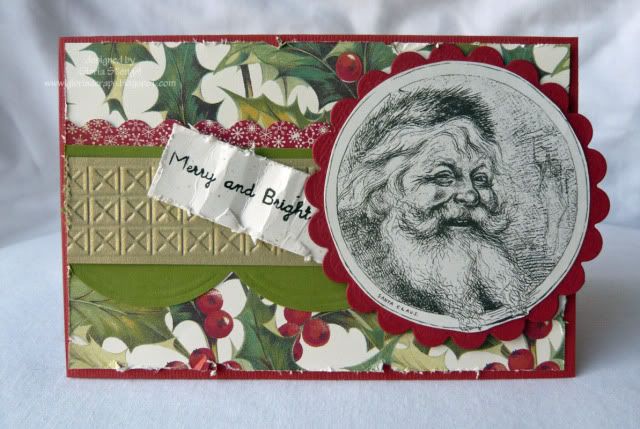
This particular one is from the Storybook Cartridge. This cartridge has some cool shapes to cut out. I of course embossed the oval w/ one of my Cuttlebug embossing folders and added some color w/ some distress ink.

Monday, December 14, 2009
Basic Grey Opaline Pearls in STORE NOW!
New Basic Grey Opaline Pearls in store @ Cropstop! We got swirls, flower w/ stems and flowers w/ vines... and they are all gorgeous! Use them as they come or cut the pearls apart and use them individually... or cut the swirls apart to make your own designs! (Images linked to item in store). We also have Basic Grey 6x6 paper packs for sale for only $5.75US.


Challenge #65 - Gift Wrapping
You have a few days to complete challenge #65. It is to create either a box or a gift wrapping for the holidays! Upload in the Weekly challenge Gallery by next Friday (December 18th). Remember to put #68 as part of the title and also upload it in the challenge thread. This is Elisabeth's inspiration for us.

Thursday, December 10, 2009
Negative FuN with your punches!

Elisabeth's brain started spinning while punching a border with her new MS punch - the negatives were so nice! So she ended up with a pile of negatives on her table. Wanna see what she came up with... it is gorgeous, so join us in our Message Board to take a peek!
Wednesday, December 9, 2009
and Pop Culture Arrived!
Gloria has made some samples to really showcase the Pop Culture border bundle. She has used two of the borders on in a simple clean card and the other in a vintage xmas card. Noticed that Gloria's samples don't have the lines around the embossed image... well read all about how to achieve this w/ your cuttlebug AND Big Shot right on our boards.

Tuesday, December 8, 2009
Xmas and Labels #9 paired up...

Turid has made a match made in heaven , with the Spellbinder's Label #7 and this Monochromatic Xmas dream of a card. We have a few of these Nesties and many more @ CropStop.com

You still have a couple of day to submit for challenge #64
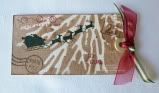
Gloria has challenged us to a tag challenge - but the tag must have some sort of unique embellishment or technique on it. It does NOT have to be a Christmas tag. It can be for a birthday, or used as an embellishment to a scrapbook page, or used as a bookmark. As long as it's a tag of some sort - AND it has something about it that's UNIQUE! Check out all her other samples at the Challenge Post. And don't forget to upload it into our Weekly Challenge Gallery.
Saturday, December 5, 2009
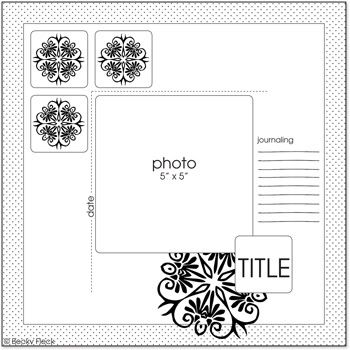
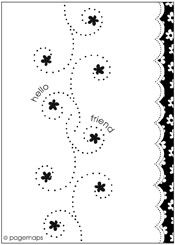
December Sketches of the Month
Every month we post a sketch challenge for our members. We will do a random draw of all entrants for a CropStop Goodie Bag on the 10th of the following month.
You are welcome to post your entries in this thread but to be eligible for the CropStop Goodie Bag you must upload them in the Gallery under Sketch Challenge's by January 10th. Remember to write DEC sketch as part of the title.
Many thanks to Becky at Page Maps for the Sketch.
You are welcome to post your entries in this thread but to be eligible for the CropStop Goodie Bag you must upload them in the Gallery under Sketch Challenge's by January 10th. Remember to write DEC sketch as part of the title.
Many thanks to Becky at Page Maps for the Sketch.
Layout Sketch
Card Sketch
Friday, December 4, 2009
DEC. ATC Challenge
 This month is all about mixed media... so mix it up... and show us! You can come and share it w/ us at the ATC Crop Stop Forum and in our ATC Gallery.
Subscribe to:
Posts (Atom)