Showing posts with label ribbon. Show all posts

Monday, January 28, 2019

Goodbye


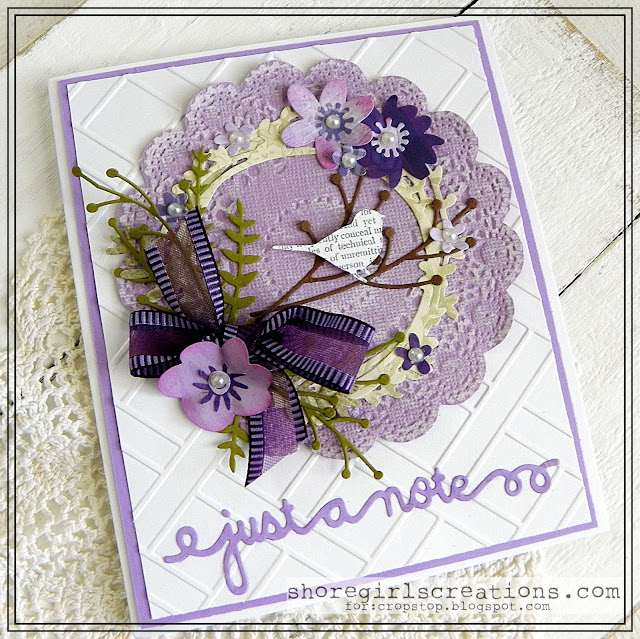
Here we are at the end of January already, and it's time to say good-bye. This is my last post for Cropstop. I've enjoyed working for Haylie-Jo for these past two years, and have been inspired by the projects you-all have linked up each month! I wanted to say a big THANK YOU for all the sweet comments you left on the challenge post this month saying how you've enjoyed the projects I've posted each week and will miss the challenges. So kind of you to take the time to say that!


Supplies and Tools:
Distress Ink in these colors: Gathered Twigs/ Vintage Photo
Script Stamp (Stampin' Up)
Fiskars Paper Crimper
Love This Die Set (Echo Park)
Sheer Ombre Gold/Ivory Ribbon 
Plaid Background Stamp (Impression Obsession)
Worn Lipstick Distress Oxide (Ranger)
Tuxedo Black Ink (Tsukinedo)
Little Birdies (Dina Wakley - Ranger)


Here's wishing you all a wonderful 2019 -- full of happiness and creativity!  Come back on Thursday to see who won the Final Cropstop Challenge.

Monday, January 14, 2019

He Heals the Broken


Hello Friends, today's card features one of my favorite stamps to use on sympathy cards. I did it up in neutral tones, adding just a touch of light blue and lavender to match the ombre ribbon from Cropstop.

Supplies and tools:
Circle Nestabilities (Spellbinders)
Blossom Nestabilities (Spellbinders)
Distress Ink in these colors: Salty Ocean/ Shaded Lilac/Hickory Smoke


I'd love to see what you've been creating, so stop by the  last link party and showoff any creation that includes a product or two from one of the companies carried in the Cropstop store. 

Monday, December 3, 2018

December Link Party #46


Happy December! It's time for a new link party here on the blog and today I'm sharing a fun festive card to kick things off.


Supplies and Tools used on this card:
St. Nicholas 2 Stamp Set (Graphic 45)
Pine Needles/Fired Brick Distress Ink (Ranger)
Dotted Ovals Dies (Spellbinders)


Now it’s your turn to share the projects you’ve been working on! As always our link party is "Anything Goes" with these few simple rules

  1. Create ANY new project using a product or two from one of the companies CropStop carries in the store. (It’s ok if you didn’t buy it from us, and also fine if it’s a product we don’t currently have it in stock as long as it’s from one of the companies we carry!)
  2. Please, no back-linking old projects
  3. Limit 5 entries per challenge
  4. Link your project here, link back to this post, and mention the CropStop Challenge in your post.
We’ll choose one random Winner who will receive a prize from the CropStop Store! (100 or more links = two winners and two prizes!) Thanks so much for linking up with us, we look forward to seeing all your great entries this month. Grab our badge and help us spread the word that CropStop is a great place to play along!


Optional Twist for December:
Create a Christmas card in traditional colors (red/green) and I'll enter your name twice in the random drawing for a prize (for each project linked). 

Friday, November 23, 2018

Guest Designer - Rebecca Yahrling


We're back with another fun guest designer post hosted by the talented his week - Rebecca Yahrling (Flickr Gallery here). Wow! Wow! Wow! This week she's created not one, but four adorable gift containers for holiday giving. I'm thinking I need to make some of these up for the food gifts I'll be giving this year!

Here's Rebecca's instructions:
"I am honored once again this week to be your Guest Designer. And their store has so many products to help us in our crafty endeavors.
With the holidays fast approaching, I thought I would try something a little different. A decorated box! It will hold quite a bit so you can use it for many different things. I always make lots of Christmas cookies so that is what I will put in my boxes.
 

Start with a 12x12 piece of double sided decorative patterned paper (or you can also adhere two, one-sided papers together as I did with my snowman box). Score one side at 3" and 9" then rotate the paper and score at 1", 3 1/2", 6 1/2" and 9".  Cut down to the middle score lines on both sides of the lid and also at the bottom to the first score line (see photo). 
Cut tabs off the top corner of sheet on both sides (also shown in photo); keep these for another small project I will show.
 
 
Tape the box together with a strong adhesive (I used scor-tape). See photo.
Now the real fun begins with decorating your box however you wish. 
 
 
This is what I did for the snowman box: I added a small rectangle of hook & loop tape for my closure using tacky glue to secure. I then wrapped & glued (tacky glue) a silver metallic wire ribbon around the box, but adhered under the lid at the top and then just to the hook & loop tape under the lid (otherwise, your box won't open!). I then die cut my decorative pieces for the top; a flourish from white glitter paper, a white doily, a blue mini doily and a blue tag (twice for dimension & stability). I glued down the flourish & the large doily. I popped up the mini doily and then glued (tacky) a white plastic snowflake on top. I then stamped the sentiment in white on the tag (it says 'menu: milk & cookies'). I used silver thread to hang the tag through one of the holes on the larger doily.
 
 
On the Deer box, I adhered the blue ribbon, but left a long tail at each end so that I could tie a loose knot for closure. I die cut my pieces: a light blue majestic label and a frill oval in cream cs. I inked all the edges of both pieces with  hickory smoke and gathered twigs. I stamped the sentiment in black & clear embossed. I adhered the blue tag and then popped up the cream oval atop it. I then die cut two flourishes from a green cs and adhered them as shown. I glued three deep red roses as shown. I then inked a wood deer with gathered twigs and for the tail, I used a white gelly roll pen. I popped him up on the right to finish. 
 
 
Now, remember the flaps I cut off at the beginning? No waste! You can adhere them together at the bottom flap (see photo). Then, holding the two sides together, punch a hole at the top, big enough to thread your ribbon through. 
 
 
Decorate as you'd like. You can add a little treat or a gift to the inside with glue dots. I plan to make some kind of a brownie bar or maybe fudge, and will put one in a small plastic bag & adhere it with a couple of glue dots.


I hope you enjoyed these projects and are inspired to make your own any time of the year. They were fun to put together and I hope to make more. Good way to use up some paper you've been hoarding forever. lol  Until next time,
Crafty hugs, Becca xxoo"
 

Supplies:
Spellbinders: Majestic Labels Eight, Frill Oval, Flight 1
Darice: Flourish die, white snowflakes
My Favorite Things: Mini Doily die
Whimsy Stamps: tag die
Peachy Cheap: large doily die
Fiskars: scallop edger punch, trimmer, hole punch
Stamp sets: YNS 'Food Truck Holiday' and Unity Stamps 'Warm Winter Comforts'
Ribbons: Offray, Joann's & Michaels
Inks: TH distress inks, Colorbox
Adhesives: Scor-tape, Tombow mono liquid glue, Aleene's tacky glue, foam squares (Recollections)
Designer papers: Cosmo Cricket, Creative Imaginations & unknown
Creatology: wooden deer
 
I'd love to see what you've been creating, so stop by the current link party and showoff any creation that includes a product or two from one of the companies carried in the Cropstop store. 

Friday, October 12, 2018

Guest Designer - Lisa

 We're back for week number two with our talented Guest Designer - Lisa of This Sweet Madness! This week Lisa has a super fun shaker card for our inspiration. Here's how she put this adorable card together:

"Hi everyone!  Lisa here from This Sweet Madness with another guest designer post.  I've been challenging myself to make more masculine cards lately, so I wanted to create a birthday card with a White Rabbit theme.

1) I started by making my card base from Desert Storm cardstock.  I created an A7 base so the pocketwatch die would fit.

2) I picked a pattern from the Tattered Time stack that I liked and cut it slightly smaller than my card base.  After die cutting the pocketwatch, I set it aside and attached a scrap of the same patterned paper to my card base.  I layered the positive part of the pocketwatch die cut to the base with Scor Tape.  

3) I stamped the White Rabbit with Archival Ink on the smooth white cardstock.  After it dried, I colored it with Prismacolor pencils.  I fussy cut it and then adhered it to the card base with Scor Tape.

4) I attached the acetate to the patterned paper with the watch cut out with Scor Tape.  The acetate won't stick without really strong adhesive.  Then I created a shaker opening with foam circles and squares, piecing them together tightly to make a well to hold my sequins.  I like to lay them out on the card base so I can see how many I do or don't need to add.  When I was happy with the amount of sequins I added, I removed the backing from the foam pieces and attached the shaker frame to my card.

5) I had stamped the "Tick Tock" on a scrap piece of the smooth white cardstock.  After cutting them out with the Gift Tags dies, I colored the entire thing with colored pencils, then went over the edges and the words with a gold Sharpie marker.  I knotted the gold ribbon through each tag and added them to my card with Mini Zots.

Thanks for looking!  Don't forget to enter the Crop Stop Linky Party this month.  Laters!"


Products Used:

TimHoltz Pocket Watch die
TimHoltz Gift Tags Die set
3L Adhesive Foam Circles and Squares
Ranger Jet Black Archival Ink
Visible Image White Rabbit stamp
Prismacolor 150 Pencil Set
Gold Sharpie marker
BazzillDesert Storm cardstock
SpectrumNoir Ultra Smooth cardstock
DCWWV Tattered Time paper pad
Graphix Acetate sheets
Offray 1/2" gold shimmer ribbon
Creatology Green Sequins Assortment

Now it's your turn to share the projects you've been working on. Stop by the CURRENT LINK PARTY and showoff anything that includes a product or two from one of the companies that Cropstop carries in the store. 

Friday, October 5, 2018

Guest Designer - Lisa

 Time for another Guest Designer Friday! The entire month of October we have a "new" crafter that's never designed for Cropstop before --- Welcome Lisa of This Sweet Madness! Lisa went over and above this week by creating not one, but four beautiful matching cards!  Here's what she says about putting this lovely set together --------
 
"Hi everyone!  I'm Lisa from This Sweet Madness and I'm thrilled to be guest designing this month here at Crop Stop!  Huge thanks to Esther and Haylie-Jo for the opportunity! I like to make cards in sets so I have them at the ready for unexpected gift needs.  These cards were quick and easy to duplicate.

1) I cut 80lb white cardstock to 4" x 5.25 and ran them through my Big Shot with the Flint embossing folder.  I like to emboss two sheets at once, I think you get a deeper impression that way.
2) Using the ink blending tool, I applied Distress Ink to each embossed panel of cardstock.  I did a yellows family (Wild Honey, Scattered Straw & Mustard Seed), a reds (Barn Door, Fired Brick, Worn Lipstick), one in greens (Peeled Paint, Crushed Olive, Forest Moss) and one in blues (Tumbled Glass, Broken China, Faded Jeans).  I like to run my lightest ink color back over the whole panel when I'm done to blend the colors better.
3) While the ink dried, I cut the smaller butterfly from the Wings of Hope die set with scraps of cardstock.  I cut two of each color, adhering them together using Mini Zots in just the center of the butterfly.  I cut the foam squares in half and put them under the wings to create the dimension.
4) After applying Scor Tape sheets to the back of silver and gold shimmer cardstock scraps, I cut the word "beautiful" from the TH Friendship Words die set, twice from each color.


 5) I eyeballed cutting my ribbon to around 5. 5" long and applied 1/4" Scor Tape to the back. I don't really like to measure so I just eyeballed where to tape the ribbon on my embossed cardstock panels. I wrapped the edges around, then adhered the panels to white A2 cards with 1/2" Scor Tape. One thing I do alwasy do is use the Scotch ATG all across the center of embossed cardstock panels. That way it all sticks down instead of poofing up on the card where the embossing makes it uneven. 
6) I glued the butterflies to teh card with teh Matte Medium glue. I like it for die cuts because it doesn't show when it dries, even on brighter colors like the red. 
7) Using the Scor Tape sheets made adhering the thin Beautiful word die cuts really easy. I added a dot over the "I" with a rhinestone and Matte Medium.  
8) Lastly I added rhinestones to the bodies and antennae of the butterflies with Mini Zots and Matte Medium.
Thanks so much for spending this time with me!! Don't forget to play along in the latest CropStop linky party! Laters!"


  Here are the supplies and tools Lisa used on her cards:
Now it's your turn to share what you've been creating! Stop by our CURRENT LINK PARTY and link up any project that includes a product or two from one of the companies Cropstop carries in the store. Hope to see you there!

Monday, October 1, 2018

October Link Party - # 44


What do plaids make you think of? For me, they evoke feelings of cool autumn nights, curled up with a good book, a warm (plaid) blanket, and a cup of something steamy in hand. That's why the entire month of October I plan to share easy, do-it-yourself, plaid backgrounds you can create using markers. There are also a couple fun ways to use your plaids, so you won't want to miss any of the Monday inspirational posts this month!


Supplies need to create your own plaid background:
  • Markers
  • Ruler
  • Graph Paper (optional)
    • I found that placing a piece of graph paper under my card front made it much easier to line up the ruler and create straight lines

Directions for my background:

  1. Beginning with an orange marker - create wide stripes both vertically and horizontally
  2. Next use a yellow marker and add wide stripes in between your orange ones
  3. Add some thin brown stripes
  4. Add some thin green stripes
  5. Using a darker yellow marker -- trace over every other yellow stripe to darken it and add interest to your background
  6. Using sponge daubers, ink around the edges with dark brown ink
  7.  


Supplies used on this card:
Note: For a mini tutorial for the flower on this card, visit the Tutorials Tab at the top of the blog and click on 3D Sunflower.


Now it’s your turn to share the projects you’ve been working on! As always our link party is "Anything Goes" with these few simple rules

  1. Create ANY new project using a product or two from one of the companies CropStop carries in the store. (It’s ok if you didn’t buy it from us, and also fine if it’s a product we don’t currently have it in stock as long as it’s from one of the companies we carry!)
  2. Please, no back-linking old projects
  3. Limit 5 entries per challenge
  4. Link your project here, link back to this post, and mention the CropStop Challenge in your post.
We’ll choose one random Winner who will receive a prize from the CropStop Store! (100 or more links = two winners and two prizes!) Thanks so much for linking up with us, we look forward to seeing all your great entries this month. Grab our badge and help us spread the word that CropStop is a great place to play along!


Optional Twist for October
Include a plaid element somewhere in your creation,
 and I'll enter your name twice in the random draw.

Monday, September 3, 2018

September Link Party - #43


I realize that fall officially begins the end of this month, but I'm not quite ready to let go of my summer yet. So....today I'm sharing one last summer card before I start into sunflowers, pumpkins, falling leaves, and all things autumn!  Here's a fun little summer scene I created with dies and layered on an embossed (and sanded) doily.


Supplies used on this card:


 Now it’s your turn to share the projects you’ve been working on! As always our link party is "Anything Goes" with these few simple rules
  1. Create ANY new project using a product or two from one of the companies CropStop carries in the store. (It’s ok if you didn’t buy it from us, and also fine if it’s a product we don’t currently have it in stock as long as it’s from one of the companies we carry!)
  2. Please, no back-linking old projects
  3. Limit 5 entries per challenge
  4. Link your project here, link back to this post, and mention the CropStop Challenge in your post.
We’ll choose one random Winner who will receive a prize from the CropStop Store! (100 or more links = two winners and two prizes!) Thanks so much for linking up with us, we look forward to seeing all your great entries this month. Grab our badge and help us spread the word that CropStop is a great place to play along!

Optional Twist for September:
Create a project that includes a doily of any kind (embossed, die cut, stamped, or bought) and I'll enter your name twice in the random draw.

Friday, August 24, 2018

Guest Designer - Kim Klinkovsky


Time for another guest design spot here on the Cropstop blog. Today we're sharing the talents of Kim Klinkovsky of My Kraft Kloset. Kim not only created two awesome cards for us, but she also included a fun tutorial with pictures!! I absolutely LOVE the super fun background she created with her embossing folder from Cropstop, color burst, and some gold metallic embossing powder! What a creative gal! 


Here's what Kim says about putting these wonderful cards together: "Hi everybody! Kim here from My Kraft Kloset  and I'm honored to be your guest designer this month! Today I'm sharing a couple of unique and amazing backgrounds created with products from the Crop Stop Store.


I started with an 5.5x11" yellow cardstock, cut in half to create two A2 (5.5x4.25") card bases. This next part is very messy, so make sure you put an old cloth or newspaper under you to protect your table, use a craft mat, wear an apron to protect your clothes, and gloves, because it can stain.

Placed a pastel pink piece of cardstock on a craft mat, sprinkled a few drops of powder from 3-4 color burst colors onto the cardstock, mist with water and watch the magic begin. It's a powder, so it will blow a little, so protect whats around you. With a little water it's bright and vibrant and gets lighter as you add more water. Feel free to tip/move your paper and move the color around or dab with a sponge or paper towel. Or add more drops if you think you need too. I let it dry over night, but you could use a heat tool for faster drying.

Tip: Use water color paper to avoid any rippling of the paper, but I wanted some of the pink of the cardstock to show through. If your paper does ripple, you can iron it lightly or press with a big book.

Once dry place the background image in an embossing folder and run through a die cut machine. Which looks stunning just like that too.

But I took it another step further and ran a brayer over a clear embossing ink pad and made it good and inky, then lightly ran the brayer over the raised images from the embossing folder. You will get some ink in between the images and thats ok or you can brush some off with a thin paint brush. Sprinkle with gold metallic embossing powder, tap off the excess, and set with a heat tool. Trim to fit and adhere to card base.

Tip: If you don't have a brayer, you can run the pad dirctly over the raised image, but you may get more ink on your panel and cover up too much of the background colors.

Cut a strip of black cardstock, cut and tie a double ribbon around one end, cut a banner tail on the other end and adhere to card with foam tape. Add a few scattered metallic liquid pearls for dimention to complete.

And there you have another way to use your embossing folders and make several unique cards with beautiful backgrounds for many occasions. Now it's your turn....stop by our Current Link Party and link up any project that includes a product or two that Cropstop carries in the store. Hope to see you there!"
Crop Stop Supplies:

Monday, June 18, 2018

Embossing Fun


Hello friends! I'm back today to share some embossing fun with you. Today I have a "peachy-pink" card that features both dry and wet embossing.  Let's get to it....


To create this card I:


  • Using the Hello Doily die set (Sizzix) I cut a paper doily from white card stock
  • I also cut a kraft sentiment using a Stamplorations die
  • To create my crinkle ribbon, I inked up some Hug Snug seam binding with Tattered Rose Distress Oxide (Ranger), spritzed it with water, balled it up, and dried it with my heat gun
  • Inside I added a strip of punched lace (Martha Stewart border punch) and one more billow flower 

Now it's your turn to share the projects you've been working on. Please stop by our CURRENT CHALLENGE and link up any project that includes a product or two from companies Cropstop carries in the store. I hope to see you there!

Monday, April 2, 2018

April Link Party - #38


It's time for a new challenge here on the new Cropstop blog. After missing the month of March (due to technical issues with the other blog), we're so happy to be back on schedule!  


Today I'm sharing a bright and cheery bird themed card I created to inspire you! Here's how I put this happy spring card together:
  •  I started by running a piece of pink polka dot designer paper through my Fiskars Paper Crimper
  • I layered my pink piece on a piece of green dp and cut a blue strip for across the bottom
  •  Using a piece of White Sheer Ruffle Edge Ribbon I tied a pretty bow around the bottom of my card front
  • Next I cut the large birdcage from black card stock using the Gilded Birds die from Memory Box and popped it up using mounting tape
  • Using the same set I die cut two little white birdies to perch inside the cage
  • I decorated my cage with some flowers from the Tea stained Teals set (Petaloo)
  • In the top corner I stamped a sentiment from  Little Birdies (Dina Wakley) in Tuxedo Black Ink (Tsukineko)
  • Inside I added a decorative panel punched with the Petal Heart punch-all-over-the-page (Martha Stewart)

Now it’s your turn to share the projects you’ve been working on!
Here’s how our challenges work:
  • Create ANY new project using products from companies  CropStop carries in the store. It’s ok if you didn’t buy it from us, and also fine if it’s a product we don’t currently have it in stock as long as it’s from one of the companies we carry!
  • Please, no back-linking old projects.
  • Limit five (5) entries per challenge.
  • Link your project here, link back to this post, and mention the CropStop Challenge in your post.
  • We’ll choose one random Winner who will receive a prize from the CropStop Store! (100 or more links = two winners and two prizes!)
Thanks so much for linking up with us, we look forward to seeing all your great entries this month. Grab our badge and help us spread the word that CropStop is a great place to play along!


Saturday, May 30, 2009

Pull-Ez Ribbon Purse - Review

Pull-Ez Ribbon Purse - Review
by Gloria Stengel 

When I first saw pictures of the Ribbon Purse I was very doubtful that it would work to solve any of my ribbon storage problems. I have a lot of ribbon, in many sizes and styles. Some of my ribbons were arranged in boxes with a rod through each spool. I also had a lot of "unspooled" ribbon that was crammed into plastic bags. Frankly, my ribbon was a mess. I had sorted my ribbon by color family, but it was still hard to find what I needed, and all those plastic bags were hard to store. 

I received the Ribbon Purse as a gift. My dear friend even had stuffed it with a few ribbons so I could see it "in action." I was still doubtful that it would hold all my ribbon, but let me just say, this purse holds...


WANT TO KNOW HOW MUCH RIBBON THE PULL-EZ HOLDS?  CHECK OUT THE REST OF THE REVIEW AT OUR CROPSTOP'S FORUM.