Showing posts with label embossing folders. Show all posts

Monday, January 28, 2019

Goodbye


Here we are at the end of January already, and it's time to say good-bye. This is my last post for Cropstop. I've enjoyed working for Haylie-Jo for these past two years, and have been inspired by the projects you-all have linked up each month! I wanted to say a big THANK YOU for all the sweet comments you left on the challenge post this month saying how you've enjoyed the projects I've posted each week and will miss the challenges. So kind of you to take the time to say that!


Supplies and Tools:
Distress Ink in these colors: Gathered Twigs/ Vintage Photo
Script Stamp (Stampin' Up)
Fiskars Paper Crimper
Love This Die Set (Echo Park)
Sheer Ombre Gold/Ivory Ribbon 
Plaid Background Stamp (Impression Obsession)
Worn Lipstick Distress Oxide (Ranger)
Tuxedo Black Ink (Tsukinedo)
Little Birdies (Dina Wakley - Ranger)


Here's wishing you all a wonderful 2019 -- full of happiness and creativity!  Come back on Thursday to see who won the Final Cropstop Challenge.

Monday, January 21, 2019

Let It Snow


Today I have a fun snow themed card for you in pinks and browns. When I was gluing my sentiment on,  I accidentally smudged some brown ink on the embossed background. Since I didn't feel like starting over, I diluted some distress oxides and created a spatter effect. Fun fix for my whoopsie!

Supplies and Tools:
These colors of Distress Oxide (Ranger) - Worn Lipstick/ Walnut Stain
Picked Raspberry Distress Ink (Ranger)
Sponge Daubers
Pearls
Alphabet Punches


I'd love to see what you've been creating, so stop by the final link party and showoff any creation that includes a product or two from one of the companies carried in the Cropstop store.

Monday, January 14, 2019

He Heals the Broken


Hello Friends, today's card features one of my favorite stamps to use on sympathy cards. I did it up in neutral tones, adding just a touch of light blue and lavender to match the ombre ribbon from Cropstop.

Supplies and tools:
Circle Nestabilities (Spellbinders)
Blossom Nestabilities (Spellbinders)
Distress Ink in these colors: Salty Ocean/ Shaded Lilac/Hickory Smoke


I'd love to see what you've been creating, so stop by the  last link party and showoff any creation that includes a product or two from one of the companies carried in the Cropstop store. 

Friday, January 11, 2019

Guest Designer - Amy Brown


 Welcome to Guest Designer Friday. Today we have a beautiful card created by our January guest designer --- Amy Brown from Brite Designs Studio. I love the way Amy used her embossing folder on this card - such a bright and pretty design! Here's what she says about putting this card together:

"I ran the gorgeous Couture Creations Hyper Magical Embossing Folder through my Big Shot to dry emboss some white cardstock, then applied a soft layer of SSS (Simon Says Stamp) Inks in Wisteria and Sky Blue to the paper with a blending brush. I die cut two circles using SSS Stitched Circle Dies, one in vellum and the other in white cardstock, then stamped this sentiment from Trinity Stamps "Let Love Grow" Stamp Set with the same SSS Wisteria Ink onto the white circle off centered a bit. I glued the circles together, then placed them to the edge of the embossed panel and trimmed down the side of the circles. I added the silver glitter cardstock strip to the right of the card before adhering the embossed panel with Ranger Multi Medium Matte. I used the same adhesive on the Glistening Snow Confetti from Trinity Stamps and these beautiful Exclusive Acetate Leaves from the Hip Kit Club November 2018 Kit. This card was inspired by Jennifer McGuire, the queen of card making!"


Products used: 
SSS (Simon Says Stamp) Inks in Wisteria and Sky Blue
SSS Stitched Circle Dies
Trinity Stamps "Let Love Grow" Stamp Set
Trinity Stamps Glistening Snow Confetti 
Hip Kit Club Exclusive Acetate Leaves
Ranger Multi Medium Matte
Blending Brush


Why not show us what you've been working on of late....stop by our FINAL LINK PARTY and show off any project that includes a product or two from companies carried in the Cropstop store. 

Monday, January 7, 2019

Changes -- Link Party #47


Hello Cropstop friends! Here we are at the beginning of a new year and with it comes some BIG changes. This will be the FINAL CHALLENGE for the Cropstop blog as I have decided to step down and Haylie-Jo has decided to give the blog a break for a while. We've enjoyed working together for these past two years, and have been inspired by all of your beautiful work.


Supplies and Tools:
Winter Wonders Stamp Set (All Night Media)


Challenge Rules:
  1. Create ANY new project using a product or two from one of the companies CropStop carries in the store. (It’s ok if you didn’t buy it from us, and also fine if it’s a product we don’t currently have it in stock as long as it’s from one of the companies we carry!)
  2. Please, no back-linking old projects
  3. Limit 5 entries per challenge
  4. Link your project here, link back to this post, and mention the CropStop Challenge in your post.


Optional Twist for this final challenge is:
Create a project in NEUTRAL TONES and I'll enter your name twice in the random draw!

(Note: This last challenge will run through January 30th - the winner will be announced January 31st!)

Monday, December 24, 2018

Dimensional Snowflake


Merry Christmas Eve! Today I have square card featuring  a multi dimensional snowflake!
Wishing all of you a Very Merry Christmas tomorrow --- may your day be happy and blessed!


Supplies used on this card:

I'd love to see what you've been creating, so stop by the current link party and showoff any creation that includes a product or two from one of the companies carried in the Cropstop store.

Monday, December 17, 2018

Fancy Drum


Today I have a quick and easy card to share with you. Since holiday's are a busy time of year I thought I'd share something that only takes a few minutes to whip up and yet still looks festive and pretty.


Supplies and Tools used on this card:
Circle & Scallop Circle Nestabilities (Spellbinders)
Music Background Stamp (Stampin' Up)
St. Nicholas 2 Stamp Set (Graphic 45)


I'd love to see what you've been creating, so stop by the current link party and showoff any creation that includes a product or two from one of the companies carried in the Cropstop store.

Monday, December 3, 2018

December Link Party #46


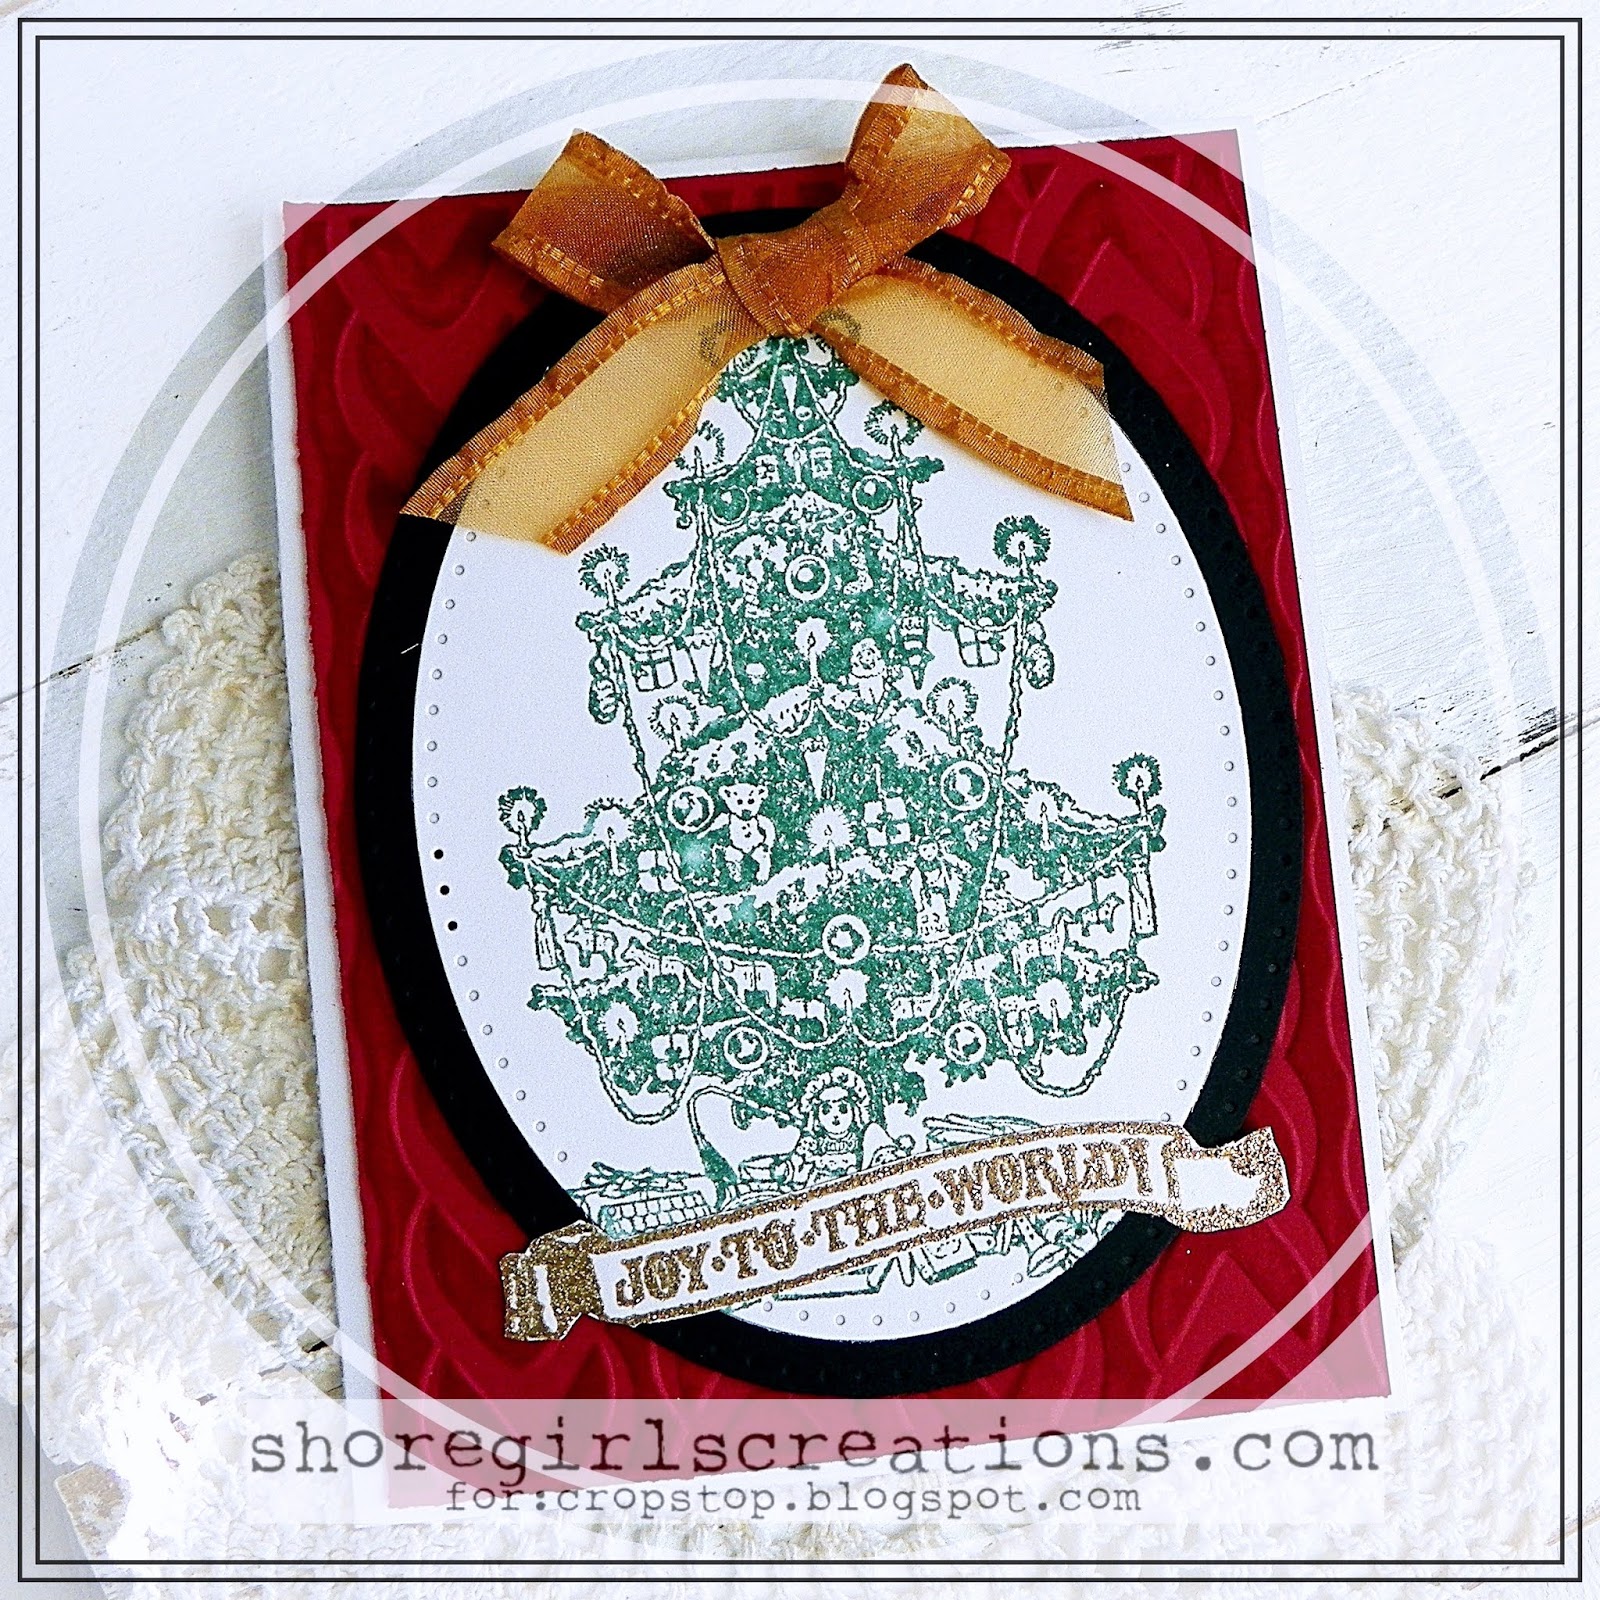
Happy December! It's time for a new link party here on the blog and today I'm sharing a fun festive card to kick things off.


Supplies and Tools used on this card:
St. Nicholas 2 Stamp Set (Graphic 45)
Pine Needles/Fired Brick Distress Ink (Ranger)
Dotted Ovals Dies (Spellbinders)


Now it’s your turn to share the projects you’ve been working on! As always our link party is "Anything Goes" with these few simple rules

  1. Create ANY new project using a product or two from one of the companies CropStop carries in the store. (It’s ok if you didn’t buy it from us, and also fine if it’s a product we don’t currently have it in stock as long as it’s from one of the companies we carry!)
  2. Please, no back-linking old projects
  3. Limit 5 entries per challenge
  4. Link your project here, link back to this post, and mention the CropStop Challenge in your post.
We’ll choose one random Winner who will receive a prize from the CropStop Store! (100 or more links = two winners and two prizes!) Thanks so much for linking up with us, we look forward to seeing all your great entries this month. Grab our badge and help us spread the word that CropStop is a great place to play along!


Optional Twist for December:
Create a Christmas card in traditional colors (red/green) and I'll enter your name twice in the random drawing for a prize (for each project linked). 

Monday, November 26, 2018

Celebrate Christmas


Hello friends! Today I have a bright and cheery Christmas card to share with you in traditional Christmas colors! Since my time in the craft room has been limited (holiday's are busy!), I thought I'd showcase a quick and simple to create card today.


 Now it's your turn....stop by the current link party and showoff any creation that includes a product or two from one of the companies carried in the Cropstop store.

Monday, November 19, 2018

Gilded Leaf


Today I'm sharing one last fall card before starting into Christmas creations next week!  This card features a beautiful gilded zentangle leaf. I kept it simple for two reason -- 1. holidays are busy and there isn't always a lot of time to craft and 2. to showcase the beautiful designs in that leaf stamp!


Supplies and Tools:

 Now it's your turn....stop by the current link party and showoff any creation that includes a product or two from one of the companies carried in the Cropstop store.

Monday, November 12, 2018

Bauble Blossoms


Hello friends! It's time for another "Inspiration Monday" post. Today I'm sharing a bright and happy card I created using some new Cropstop supplies I recently acquired!


Here's how I put this card together:


Now it's your turn....stop by the current link party and showoff any creation that includes a product or two from one of the companies carried in the Cropstop store.

Monday, October 22, 2018

Pumpkin Plaid


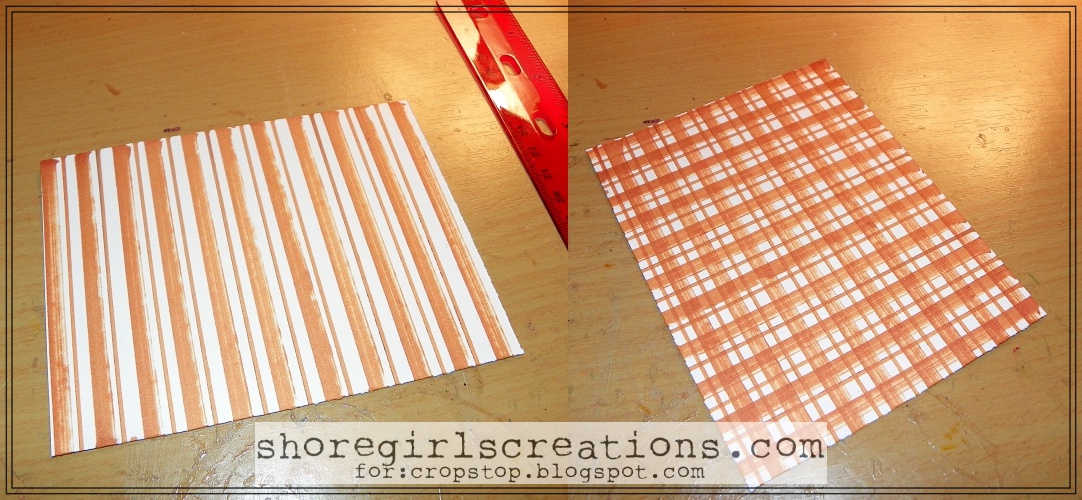
Have you been following our "October Plaid" posts all month? Each Monday I've shared a different version of plaid created with markers, a ruler, and some graph paper. Today I have a one-color plaid background to share with you.


To create this fun pumpkin plaid background I laid down a wide orange stripe followed by a thin orange stripe all the way across my card stock. I then turned the piece of paper 90 degrees and repeated the design.


Supplies used on this card include:


Here's a free pumpkin template for you to use on your autumn themed projects


Now it's your turn....stop by the current link party and showoff any creation that includes a product or two from one of the companies carried in the Cropstop store.

Friday, October 19, 2018

Guest Designer -- Lisa


Hello Friends -- we're back for another Guest Designer Friday! As promised we have another one of Lisa's (This Sweet Madness) beautiful creations to share with you. Don't you just love this bright and happy card she put together to inspire us today? I do! Here's her instructions for creating this beauty:


1) I cut the Neenah cardstock to 5x7 and ran it through my Big Shot with the Great Almanzo folder.  I always cut my cardstock bigger than I want it before embossing because the texture does take up some of the size of the paper and then it allows me to trim off any flat edges I might get from my old machine.

2) I colored the embossed cardstock with the Distress Inks and then spritzed it with water using the Sprayer.  I like to let it dry naturally rather than using a heat gun, you get more color variation that way.

3) While it was drying, I cut several sets of the Tattered Florals with the Canson Mixed Media cardstock.  Leaving the flowers in the paper strip, I inked them with the Distress Oxide inks and then sprayed them with water.  I did roll a paper towel over them to help sop up the water and create texture, then let them air dry,

4) I didn't think the Kraft card base showed up enough, so I took the gold Sharpie and colored the borders of the card where it would show outside my trimmed embossed panel.

5) I like my die-cut words to be sticky so I adhered 1" Scor Tape to the back of some black cardstock scraps, then cut the "Hello" and "friend' words from the die set three times each.  Stacked them together and then thought the black was too harsh so I colored over it with the Gold Sharpie.

6) I layered the floral die cuts together with the Zots, then added rhinestones to the centers.

7) I used 1/4" Scor Tape to attach the embossed panel to my card, then used Zots to attach the flowers.  The word die cuts completed the card.


Product List:
Tim Holtz Distress Inks: Mustard Seed, Spiced Marmalade, Wild Honey, Fossilized Amber, Carved Pumpkin, Scattered Straw
Tim Holtz Distress Oxide Inks: Wild Honey, Spiced Marmalade, Carved Pumpkin, Seedless Preserves, Dusty Concord, Shaded Lilac, Picked Raspberries, Wilted Violet
Tim Holtz Friendship Words Script Die set
Tim Holtz Tattered Florals strip die
Distress Spray Bottle
80lb Neenah Solar White cardstock
Canson Mixed Media paper
Darice Kraft A7 cards & envelopes
Gold Sharpie
Darice Big Value rhinestone assortment

Now it's your turn! Stop by the current link party and showoff any project that includes a product or two from one of the companies Cropstop carries in the store! Hope to see you there!

Monday, October 8, 2018

Plaid Leaves


As promised I'm back with an "October Plaid" post. Today I'm sharing a fun fall plaid that has no white space in it. Instead of using it as a background, I die cut it into beautiful autumn leaves.


To create this background I:
  • laid down wide stripes in orange, burgundy, and yellow
  • turned my paper and added wide brown, green, and yellow stripes
  • added a few dark brown thin stripes as accents
Note: Using a ruler and graph paper helps to keep the lines straighter than trying to free-hand them


Supplies used on this card:
Fun tip: To achieve the look of  morning dew on your leaves: Stamp your versamark watermark ink pad on the leaf, add UTEE, lightly rub most of it off with your finger, and heat set.


I'd love to see your take on plaid, so stop by the current link party and showoff any creation that includes a product or two from one of the companies carried in the Cropstop store.

Friday, October 5, 2018

Guest Designer - Lisa

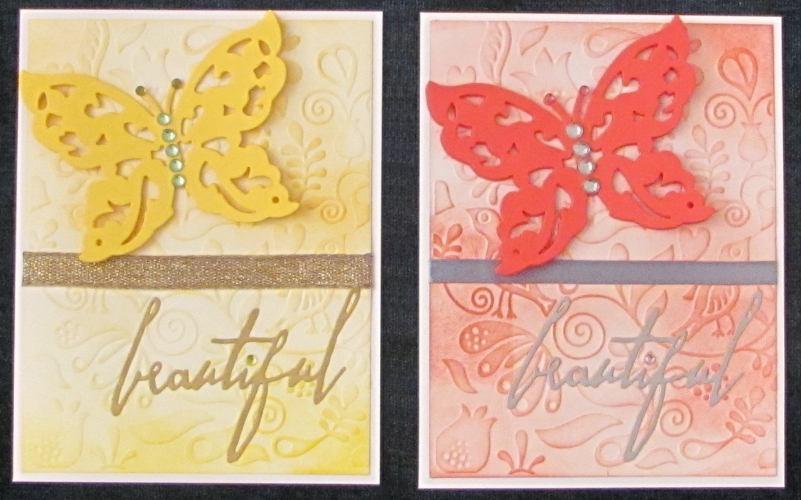
 Time for another Guest Designer Friday! The entire month of October we have a "new" crafter that's never designed for Cropstop before --- Welcome Lisa of This Sweet Madness! Lisa went over and above this week by creating not one, but four beautiful matching cards!  Here's what she says about putting this lovely set together --------
 
"Hi everyone!  I'm Lisa from This Sweet Madness and I'm thrilled to be guest designing this month here at Crop Stop!  Huge thanks to Esther and Haylie-Jo for the opportunity! I like to make cards in sets so I have them at the ready for unexpected gift needs.  These cards were quick and easy to duplicate.

1) I cut 80lb white cardstock to 4" x 5.25 and ran them through my Big Shot with the Flint embossing folder.  I like to emboss two sheets at once, I think you get a deeper impression that way.
2) Using the ink blending tool, I applied Distress Ink to each embossed panel of cardstock.  I did a yellows family (Wild Honey, Scattered Straw & Mustard Seed), a reds (Barn Door, Fired Brick, Worn Lipstick), one in greens (Peeled Paint, Crushed Olive, Forest Moss) and one in blues (Tumbled Glass, Broken China, Faded Jeans).  I like to run my lightest ink color back over the whole panel when I'm done to blend the colors better.
3) While the ink dried, I cut the smaller butterfly from the Wings of Hope die set with scraps of cardstock.  I cut two of each color, adhering them together using Mini Zots in just the center of the butterfly.  I cut the foam squares in half and put them under the wings to create the dimension.
4) After applying Scor Tape sheets to the back of silver and gold shimmer cardstock scraps, I cut the word "beautiful" from the TH Friendship Words die set, twice from each color.


 5) I eyeballed cutting my ribbon to around 5. 5" long and applied 1/4" Scor Tape to the back. I don't really like to measure so I just eyeballed where to tape the ribbon on my embossed cardstock panels. I wrapped the edges around, then adhered the panels to white A2 cards with 1/2" Scor Tape. One thing I do alwasy do is use the Scotch ATG all across the center of embossed cardstock panels. That way it all sticks down instead of poofing up on the card where the embossing makes it uneven. 
6) I glued the butterflies to teh card with teh Matte Medium glue. I like it for die cuts because it doesn't show when it dries, even on brighter colors like the red. 
7) Using the Scor Tape sheets made adhering the thin Beautiful word die cuts really easy. I added a dot over the "I" with a rhinestone and Matte Medium.  
8) Lastly I added rhinestones to the bodies and antennae of the butterflies with Mini Zots and Matte Medium.
Thanks so much for spending this time with me!! Don't forget to play along in the latest CropStop linky party! Laters!"


  Here are the supplies and tools Lisa used on her cards:
Now it's your turn to share what you've been creating! Stop by our CURRENT LINK PARTY and link up any project that includes a product or two from one of the companies Cropstop carries in the store. Hope to see you there!

Friday, September 28, 2018

Guest Designer - Sherry Gibson


Time for another guest designer Friday! Today we're sharing another beautiful card created by Sherry Gibson of Loose Stitches and Unraveled Threads. Sherry created a gorgeous vintage themed card filled with lots of detail and lovely 3D elements! I love the inked background and those pretty rolled roses!


 Here's what Sherry says about putting this lovely card together:

"Hello Everyone,
First I want to say thank you to Esther for allowing me this opportunity to be a Guest Designer for CropStop again. For This Card - Step By Step...

  • White cardstock for the card base.
  • Cut a piece of ivory cardstock to fit the center of the card.
  • Used Couture Creations 'Chiaro' Embossing Folder on the ivory cardstock.
  • Cut out the Creative Expressions 'Petite Butterflies' Dies with ivory cardstock.
  • Cut out the Darice Embossing Essentials Dies 'Ivy Border'.
  • Using a piece of The Paper Studio 'Tattered and Worn' Paper...For my flowers.
  • To make my flowers...Cut circles/cut them in a spiral shape/rolled them and glued to end.
  • Used a Ranger Ink Applicator with Tim Holtz Distress Ink Pad 'Tea Dye' - butterfly wings.
  • With the ink applicator I used Tim Holtz Distress Ink Pad 'Vintage Photo' - on these...
  • On the card base/over the embossed background/on the flowers
  • Next I taped the embossed cardstock to the card.
  • With the ink applicator I used Tim Holtz Distress Ink Pad 'Tattered Rose' - on the doily.
  • Weaved coffee stained lace and a string of pearls around the doily.
  • Used a strand of coffee stained gauge to tie the tail ends of the lace and pearls together.
  • Attached Score-Tape to the back of the doily and added it to the card.
  • Fussy cut the image out and taped it in the center of the doily.
  • Wove the ivy border in and out of the bottom part of the doily and taped it in place.
  • Glued a piece of coffee stained gauge to the bottom center of the doily.
  • Glued the flowers onto the gauge.
  • Glued a small piece of coffee stained gauge to the top center of the doily.
  • Glued the flowers onto the gauge.
  • Then glued the butterflies onto the card.


...Products Used...
Sizzix BIGkick Machine by Vintaj
Couture Creations 'Chiaro' Embossing Folder - Serenity Collection
Creative Expressions Craft Dies By Sue Wilson 'Finishing Touches/Petite Butterflies'
Darice Craft Dies 'Round Doily'
Darice Embossing Essentials Dies Ivy Border
Elizabeth Craft Designs Fine Pointed Scissors and Tweezers
Prima Marketing Comfort Craft Distressing Tool
The Paper Studio 'Tattered and Worn' Paper - for flowers
The Paper Studio 'Kirby Teesdale Studio' Paper - image
Ranger Adirondack Alcohol Ink Applicator
Tim Holtz Distress Ink Pad 'Tea Dye'/Vintage Photo/Tattered Rose'
Coffee Stained Gauge and Lace
Strand Of Pearls and Flowers
Scor-Tape (Double Sided)
Kokuyo Dotliner Tape Runner
Ad-tech Crafter's Precision Glue
Beacon Gem-Tac Glue
White/Pink/Ivory/Olive Cardstock 

I enjoy being a guest designer for CropStop. I hope that you enjoy my card."


Now it's your turn! Stop by our Current Challenge and link up any project that includes a product or two from one of the companies Cropstop carries in the store.  Hope to see you there!