Showing posts with label tutorial. Show all posts

Friday, November 9, 2018

Guest Designer - Marsha Drain

It's time for some guest designer inspiration, and today we're sharing the work of Marsha Drain of Gramma's Room. Marsha not only made an adorable birthday card, but she also included directions and a template for creating a step card! I love the bright, happy colors of her card, and especially like her fun design.


Here's what Marsha says about putting this cheerful card together:
"Most of the time I do my cutting with a guillotine type cutter but in order to make this side step card, I pulled out my smaller cutter .  I started with a 5 1/2 x 8 1/2 piece of orange cardstock.  After cutting the two lines as per the template, I moved the card to my Scor pal and scored all the lines.  After making the base and adhering the dotted patterned paper with Tombow Adhesive tape, the really run part began - stamping the cake, the cluster of balloons and coloring them.  Both the cake and the balloons are cut out with coordinating dies.  The large balloons were cut from cardstock that matched the Copic colors I used on the small balloons.  The sentiment piece is cut with a Spellbinder circle die and backed with a Spellbinder scalloped circle die. After coloring the cake, I added liquid pearls to the dots on the cake
All the balloons and sentiment are adhered to the steps with Scor Tape.  The last step was to pop the cake up with dimension foam tape."
 

Products used:
Paper Sweeties stamps and dies
Stamploration balloon dies
Spellbinder circle and scallop circle dies
Scor pal
Copics
 
 
I'd love to see what you've been creating, so stop by the current link party and showoff any creation that includes a product or two from one of the companies carried in the Cropstop store. 

Wednesday, October 31, 2018

October Plaid Links

Just in case you missed any of the "October Plaid" posts you can find them by clicking on the photos below:

https://cropstop.blogspot.com/2018/10/october-link-party-44.html
https://cropstop.blogspot.com/2018/10/plaid-leaves.html
https://cropstop.blogspot.com/2018/10/monocramatic-plaid.html
https://cropstop.blogspot.com/2018/10/pumpkin-plaid.html
https://cropstop.blogspot.com/2018/10/blanket-plaid.html


Monday, October 22, 2018

Pumpkin Plaid


Have you been following our "October Plaid" posts all month? Each Monday I've shared a different version of plaid created with markers, a ruler, and some graph paper. Today I have a one-color plaid background to share with you.


To create this fun pumpkin plaid background I laid down a wide orange stripe followed by a thin orange stripe all the way across my card stock. I then turned the piece of paper 90 degrees and repeated the design.


Supplies used on this card include:


Here's a free pumpkin template for you to use on your autumn themed projects


Now it's your turn....stop by the current link party and showoff any creation that includes a product or two from one of the companies carried in the Cropstop store.

Monday, October 1, 2018

October Link Party - # 44


What do plaids make you think of? For me, they evoke feelings of cool autumn nights, curled up with a good book, a warm (plaid) blanket, and a cup of something steamy in hand. That's why the entire month of October I plan to share easy, do-it-yourself, plaid backgrounds you can create using markers. There are also a couple fun ways to use your plaids, so you won't want to miss any of the Monday inspirational posts this month!


Supplies need to create your own plaid background:
  • Markers
  • Ruler
  • Graph Paper (optional)
    • I found that placing a piece of graph paper under my card front made it much easier to line up the ruler and create straight lines

Directions for my background:

  1. Beginning with an orange marker - create wide stripes both vertically and horizontally
  2. Next use a yellow marker and add wide stripes in between your orange ones
  3. Add some thin brown stripes
  4. Add some thin green stripes
  5. Using a darker yellow marker -- trace over every other yellow stripe to darken it and add interest to your background
  6. Using sponge daubers, ink around the edges with dark brown ink
  7.  


Supplies used on this card:
Note: For a mini tutorial for the flower on this card, visit the Tutorials Tab at the top of the blog and click on 3D Sunflower.


Now it’s your turn to share the projects you’ve been working on! As always our link party is "Anything Goes" with these few simple rules

  1. Create ANY new project using a product or two from one of the companies CropStop carries in the store. (It’s ok if you didn’t buy it from us, and also fine if it’s a product we don’t currently have it in stock as long as it’s from one of the companies we carry!)
  2. Please, no back-linking old projects
  3. Limit 5 entries per challenge
  4. Link your project here, link back to this post, and mention the CropStop Challenge in your post.
We’ll choose one random Winner who will receive a prize from the CropStop Store! (100 or more links = two winners and two prizes!) Thanks so much for linking up with us, we look forward to seeing all your great entries this month. Grab our badge and help us spread the word that CropStop is a great place to play along!


Optional Twist for October
Include a plaid element somewhere in your creation,
 and I'll enter your name twice in the random draw.

Monday, September 17, 2018

Distress Paper Mosaic


Today's post is all about fall and showcasing the Distress Paper Mosaic kit from Ranger! What a fun kit with so many different options for creating! I'm going to walk you through the steps I took to create this leaf card and also have a free template for you at the end of this post.  Let's get started....


Step One: trace and cut out the front of your card using the free template at the end of this post
Step Two: Add a layer of Distress Grout (from the kit) using a pallette knife - allow to dry (approx. 10 minutes)
Step Three: Cut some pieces of paper in random shapes
Step Four: Glue your paper pieces to your grouted leaf using Distress glue
Step Five: Apply a layer of glue over top of the entire leaf and allow to dry (approx 10 -15 minutes)
Step Six: Using the Distress Glaze, outline and fill in each mosaic shape - allow to dry (approx 1 hour)
Step Seven: Apply distress ink over the entire surface 
Step Eight: Finish decorating your card


Products used on my card include:

As promised, here's a free template for creating your own leaf card! I'd love to see what you create with this, so stop by the current link party and showoff any creation that includes a product or two from one of the companies carried in the Cropstop store.


Monday, September 10, 2018

3D Sunflower


Fall weather hasn't arrived yet (where I live), but maybe this autumn themed card I created with a beautiful 3D sunflower on it will get things moving in that direction! (smile!) I used one of the old Heartfelt Creations stamps sets to create it, and I have a mini tutorial to show you how it's done.


Step One: Stamp and cut out three different sizes of flowers (the photo shows only one large one -- I actually used two)
Step Two: Ink your flowers with coordinating ink making the centers darkest
Step Three: Cut between each petal of your flowers
Step Four: Spritz the reverse side of your flowers with water


Step Five: Crumple each flower into a tiny ball
Step Six: Unflold and twist and crumple your petals
Step Seven: Heat Set
Step Eight: For sunflowers - add some glue and instant coffee to the center


Note: If you don't want the coffee to dissolve in your glue use perk coffee instead of instant. (You can check out the other look by visiting this post.)

Supplies and Tools used on this card:


Have you been working on fall cards? If so I'd love to see your work! Stop by the current link party and showoff any project that includes a product or two from one of the companies Cropstop carries in the store.

Monday, August 27, 2018

Retiform Stamping


Hello friends! Today I'm sharing a card made with an old technique that I just recently learned about from my friend Shirley (Glittered Paws). The technique is called Retiform Stamping, and I'm showcasing it today as well as showing you how I made this card.


To create my background I:
  • marked off a section of my card front with a piece of cardstock and inked along it's edge
  • moved the cardstock and inked again
  • kept moving/inking till I created the "boxes" you see above
  • lightly inked the inside of the geometric lines

Next I:
  • isolated each box with post it notes and stamped different designs in distress oxide ink
  • added a piece of burlap ribbon across the bottom
  • added a Heartfelt Creations sentiment to the bottom corner
  • matted my piece on brown card stock and adhered it to my kraft card 


Here are the supplies I used on this card:


I'd love to see any creations you might come up with using this old technique, so stop by the current link party and showoff any project that includes a product or two from companies carried in the Cropstop store. 

Monday, August 6, 2018

August Link Party - #42


Time for another link party here on the Cropstop blog. Last month I shared an easy way to create a striped background, and this month I'm back for Take #2.


To create the background for my first card I:

I decorated this card by:


For my second card I painted smaller stripes in the center of my watercolor paper panel using blues and greens. The colors of distress ink from top to bottom are:
Twisted Citron, Cracked Pistachio, Peacock Feathers, Salty Ocean, Mermaid Lagoon


I decorated this card by:
  • stamping the butterfly and hearts from the Watercolor stamp/stencil set (Tim Holtz) on water color paper and fussy cutting
  • stamping the sentiment (Bird Crazy stamp/stencil set - Tim Holtz) in two colors of distress ink, slightly offset from each other
  • adding some clear glitter to the hearts and center of my butterfly


 Now it’s your turn to share the projects you’ve been working on! As always our link party is "Anything Goes" with these few simple rules:


  1. Create ANY new project using a product or two from one of the companies CropStop carries in the store. (It’s ok if you didn’t buy it from us, and also fine if it’s a product we don’t currently have it in stock as long as it’s from one of the companies we carry!)
  2. Please, no back-linking old projects
  3. Limit 5 entries per challenge
  4. Link your project here, link back to this post, and mention the CropStop Challenge in your post.
We’ll choose one random Winner who will receive a prize from the CropStop Store! (100 or more links = two winners and two prizes!) Thanks so much for linking up with us, we look forward to seeing all your great entries this month. Grab our badge and help us spread the word that CropStop is a great place to play along!


Optional Twist for August:
Create a project that includes a striped background and I'll enter your name twice in the random draw.


Monday, July 16, 2018

Coloring Gesso


Today I'm sharing a fun new technique I learned for coloring over top of white gesso! It's super easy, a little messy, and lots of fun!


Here are the steps I used to create the pretty panel on my card:
  1. Lay a stencil over a piece of black card stock (I used the Watercolor stencil from Tim Holtz)
  2. Apply White Gesso (Art Basics) over your entire panel
  3. Remove stencil and wash the gesso off
  4. Allow your gesso to dry (or help it along with a heat gun)
  5. Once the gesso is dry, apply your choice of colors using Distress Crayons (Ranger) ~~ [I used Tumbled Glass - Mermaid Lagoon - Shaded Lilac]
  6. Rub the colors in with your finger - apply more in areas you see need it
  7. Remove your stencil and - wa-la - a colorful-textured background!


To create my card I:


I would love to see your take on this fun technique, so after you've finished creating - stop by the CURRENT CHALLENGE and link up!! Hope to see you there!

Monday, July 2, 2018

July Link Party - #41


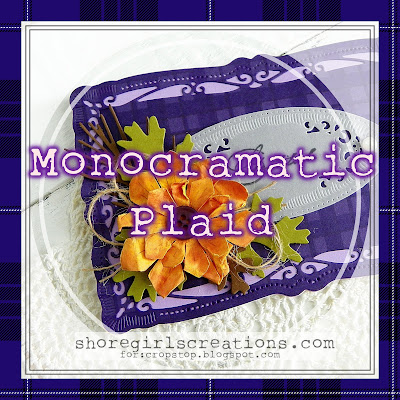
Hello friends! Today I'm sharing my updated tutorial for creating a weathered wood background. I originally posted this on the Wordpress blog, but since we are no longer using that site I thought I'd post it over here as well.


Step One: Gather your supplies - White Glue, Paint, Stiff Cardboard, Sandpaper
Step Two: Cut your cardboard to size and using a Scoring Board, create boards every 1/4 inch
Step Three: Cover your entire piece of cardboard with white school glue and let dry till tacky


Step Four: Paint over your tacky glue with your choice of paint (I used Blueprint Sketch Distress Paint ---- NOTE: do not apply using applicator, remove lid and use a paintbrush!)
Step Five: Dry using a heat gun (if you did it correctly, cracks will appear)
Step Six: Add a coordinating color of paint  and heat set (I added Hickory Smoke Distress Paint)


Step Seven: Apply a little bit of Picket Fence Distress Stain and rub in with your finger (heat set)
Step Eight: Re-score your lines
Step Nine: Sand edges and center to create a rough, worn look


Here's how I finished creating my card:
  • I added a piece of blue Petaloo lace across the bottom of my wood background
  • I die cut a bird cage using the Gilded Birds die (Memory Box - Poppystamps) from dictionary page
  • In the bottom corner I added greenery and branches cut from the Fall Foliage Thinlits (Tim Hotlz)
  • I created crinkle ribbon using seam binding and Wild Honey - Worn Lipstick Distress Oxide (Ranger)
  • I created three flowers by layering punched dictionary pages and adding a tiny pearl to the center
  • I tucked a pretty little bird from Mitrushova Art into my ribbon
  • The top of the cage features one of the dictionary page flowers glued over a Burlap String bow
  • Underneath is a tiny die cut tag (Cuttlebug) stamped with a sentiment from Dina Wakley's Little Birdies and inked withe Walnut Stain Distress Oxide

 Now it’s your turn to share the projects you’ve been working on! As always our link party is "Anything Goes" with these few simple rules:

  1. Create ANY new project using a product or two from one of the companies CropStop carries in the store. (It’s ok if you didn’t buy it from us, and also fine if it’s a product we don’t currently have it in stock as long as it’s from one of the companies we carry!)
  2. Please, no back-linking old projects
  3. Limit 5 entries per challenge
  4. Link your project here, link back to this post, and mention the CropStop Challenge in your post.
We’ll choose one random Winner who will receive a prize from the CropStop Store! (100 or more links = two winners and two prizes!) Thanks so much for linking up with us, we look forward to seeing all your great entries this month. Grab our badge and help us spread the word that CropStop is a great place to play along!


Optional Twist for July:
Create a project that features a handmade wood background of any kind and I'll enter your name twice in the random draw (for each project linked)!